Why Proper Removal Matters More Than You Think
Natural nails are made of layers of keratin and are surprisingly delicate. When artificial nails are stuck on or bonded using glue or resin, forcefully removing them — such as ripping or peeling — literally takes away layers of your own nails, making them thinner, weak, and more prone to breakage. Rushing the process is one of the biggest hidden mistakes most people make.
In contrast, a thoughtful removal with the right products and techniques — such as using a chemical remover and protective steps — helps preserve the health and integrity of your nails.
Types of Nails & Compatible Removers
Most pages gloss over this, but not all nails are the same — and different types require different removers:
Acrylic Nails
These are one of the most common artificial enhancements and are created by bonding acrylic material to your natural nail. They are strong but require a solvent-based artificial nail remover, typically acetone-based, to break them down safely.
Gel Nails
Gel enhancements are slightly different in composition and sometimes need a soak-off gel remover or heavier acetone method. Not all gel nails dissolve easily in classic nail polish remover.
Press-On Nails
These often use adhesive tabs or glue. They can sometimes be removed using gentler removers or warm water methods, but a specialised artificial nail remover helps dissolve glue more effectively with less damage.
Dip Powder Nails
Dip powder nails sometimes require longer acetone exposure or professional tools because of their strong bonding and layered application.
Understanding the type of nails you have is a critical first step that many guides fail to emphasise.
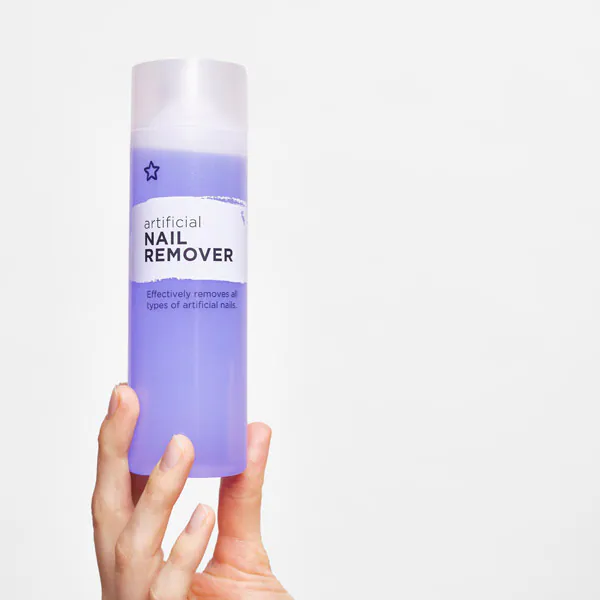
How Artificial Nail Remover Works
At a chemical level, most removers designed for artificial nails contain compounds that break down the polymers in acrylic or gel products. The strongest and most effective solvent for this is pure or almost pure acetone, which directly dissolves the synthetic material.
Simpler nail polish removers usually contain diluted acetone or other solvents that are too weak to fully dissolve acrylic or gel layers, which is why using the correct remover is crucial.
Step-by-Step Safe Removal Process
Here’s the comprehensive sequence most articles fail to give in clear, actionable detail:
1. Prepare Your Workspace & Tools
- Work in a well-ventilated area
- Lay down towels or paper towels
- Use a glass or ceramic bowl (not plastic)
- Gather cotton balls, foil wraps, cuticle pusher, nail file, clips
Using the right tools first reduces stress and helps the remover work more efficiently.
2. Trim and File the Nail Surface
Before using any remover, shorten the artificial nails with clippers and gently file the top shiny layer. This step helps the remover penetrate faster and more thoroughly, which many guides don’t mention.
3. Apply Artificial Nail Remover Properly
Pour your artificial nail remover into a bowl or use soaked cotton balls directly on the nail surface. Wrap each fingertip in aluminium foil or use nail remover clips to keep the cotton in place. This traps the solvent and allows heat from your body to speed the process.
4. Soak and Monitor
Allow the nails to soak for 15–30 minutes, checking one at a time. If they don’t soften enough, rewrap and soak a little longer. Rushing this step increases the risk of damage and is one of the biggest oversights in most guides.
5. Gently Push Off Softened Product
After soaking, don’t pry hard. Use a wooden orangewood stick or a cuticle pusher to gently slide the softened product off. If it resists, soak again. Forcing removal can strip layers of your natural nail.
Non-Acetone and Gentler Alternatives
For those with sensitive skin or less stubborn enhancements, gentler methods exist:
Warm Soapy Water
Soaking in warm water helps loosen glue or adhesive on press-on nails without strong chemicals. Gentle oils like olive or cuticle oil can also help break down adhesive bonds.
This approach is slower but much kinder to your nails and skin, especially if you plan to reuse press-on sets.
🧠 Common Mistakes & Hidden Risks Most Pages Don’t Cover
Ripping or Pulling Off Nails
This is the #1 way to cause peeling, thinning, and long-term damage. Always soak and work gently.
Using Metal Tools Aggressively
Metal can scratch and dent your natural nail plate; always use wooden or plastic tools.
Skipping Aftercare
Many guides stop after removal steps, but aftercare is critical — proper hydration and protection help nails recover from the drying effects of solvents like acetone.
Aftercare: Restore & Rejuvenate Your Natural Nails
After using artificial nail remover, your nails may feel dry or brittle because solvents like acetone strip natural oils. This is where most pages fall short — they don’t emphasise nail restoration at all.
Here’s how to help your nails recover:
1. Moisturise Immediately
Use high-quality cuticle oils, hand creams, or natural oils like jojoba or almond to replenish moisture.
2. Consider Strengthening Treatments
Look for strengtheners or products with keratin, biotin, or calcium to support nails while they recover.
3. Regular Hydration & Gentle Buffing
Avoid aggressive buffing right after removal. Instead, lightly smooth the surface and maintain moisture.
4. Give Your Nails a Break
After many cycles of artificial application and removal, your natural nails need time to breathe. Giving them a break can improve long-term strength and reduce brittleness.
Choosing the Right Artificial Nail Remover for You
When selecting a remover, consider:
🔹 Purpose
A strong acetone-based remover for acrylics and gels
A gentler, non-acetone remover for press-ons or sensitive nails
Different formulations have different drying effects and speeds.
🔹 Skin Sensitivity
If you have sensitive skin, look for formulas with moisturisers or use a barrier like petroleum jelly around the nail bed before soaking.
🔹 Sustainability
Some removers are more eco-friendly and have fewer volatile organic compounds (VOCs), which benefit both users and the environment.
Tips for Preserving Nail Health Between Sets
Here’s something most guides don’t delve into:
✔ Use cuticle oil daily
✔ Avoid overly frequent applications of artificial enhancements
✔ Limit abrasive filing
✔ Eat a balanced diet rich in vitamins for nail growth
✔ Take breaks between sets to allow recovery
These practices strengthen nails long before you even need to use a remover.
When to See a Professional
While DIY removal can work well, some situations are better left to experts:
- Severe lifting or infection
- Nails that tear or cause intense pain
- Unusual swelling or redness
- Signs of allergy or dermatitis